We thank Jared Busch from Bundy and Associates for writing this guide.
Note: All screenshots from FreePBX 15, current as of November 11, 2020. Your specific screens may vary.
Now that you have Skyetel setup to deliver calls to your PBX, it is time to setup FreePBX to accept those calls. This is done by creating a Trunk.
1. Sign in to your FreePBX instance
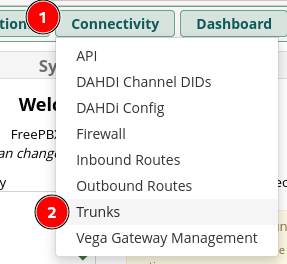
2. Click on Connectivity and then Trunks
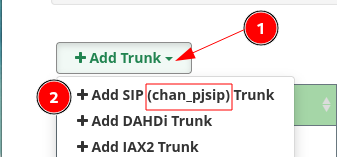
3. Click on the Add Trunk button to show a list of options and then click on Add SIP (chan_pjsip) Trunk
- Be certain it says chan_pjsip or you will not have a working system.
- Depending on your FreePBX configuration, you may still see the legacy chan_sip option. This will not work.
4. You will get the Add Trunk screen with 3 tabs, we will start on the General tab.

5. Trunk Name is a descriptive name for the trunk.
- Name this one Skyetel_Inbound
- It cannot have spaces, and FreePBX will auto populate an underscore (_) if you press space.

6. Hide CallerID should be set to No by default. Leave it that way.

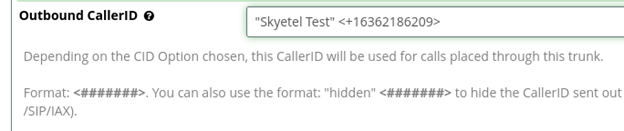
7. Outbound CallerID should always be populated on all trunks as whatever your main number is with Skyetel.
- This value is the default to use if a call goes out this trunk without any other Caller ID defined.
- We will use the E.164 format for the number
- + then Country Code then Number
- The name section should be limited to 15 characters, the maximum for legacy POTS Caller ID.
- Also, do not expect the name portion to be seen by most recipients. Skyetel will pass along whatever name is entered here, but it is up the the other side to accept it.
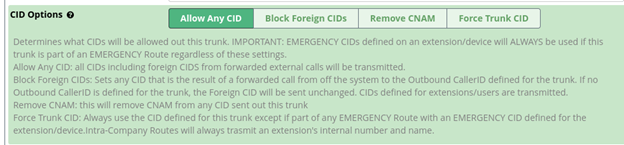
8. CID Options should be left on the default of Allow Any CID. You can read the help text to learn more about how this works.
9. Maximum Channels should be set to at least one higher than you set in the Fraud Alert for the Endpoint in Skyetel.
- Only outbound calls are counted towards this maximum.

10. Asterisk Trunk Dial Options should never be changed from System

11. Continue if Busy can be left at No for the Skyetel_Inbound trunk as this only applies if the trunk is used in an Outbound Route

12. Disable Trunk must be set to No or the system will not use the trunk.

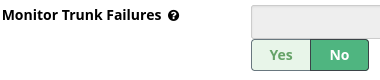
13. Monitor Trunk Failures is an advanced setting and does not mean what most people think. Leave it set to No.
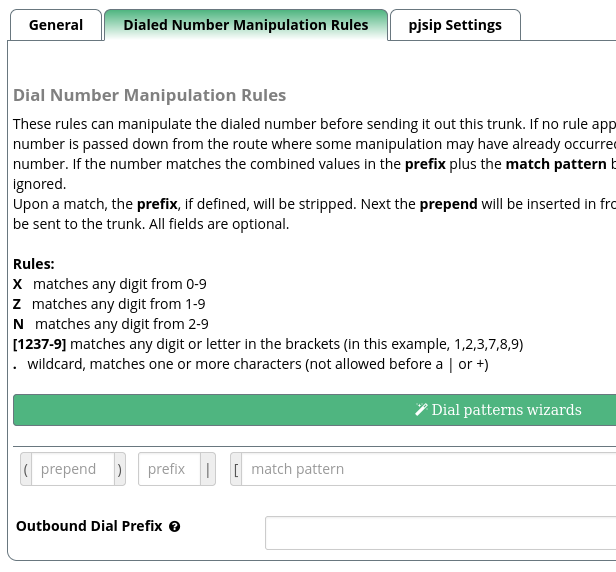
14. Moving on to the Dialed Number Manipulation Rules tab, is easy as you will leave this all blank.
- You do not do anything on this tab for a trunk, unless there are special circumstances.
- More detail on this will be discussed in the Outbound Route setup.
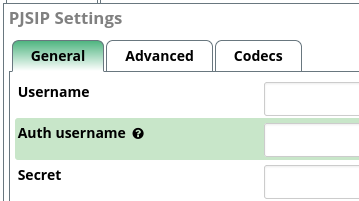
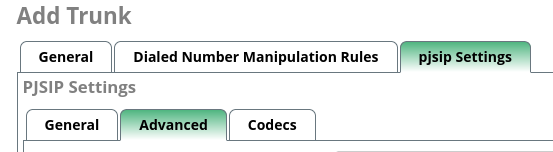
15. On to the pjsip Settings tab, which has three sub tabs.
The General sub tab is where you tell the trunk what it is connecting to. You will leave Username, Auth username, and Secret empty.
16. Authentication will be changed to None, which cause the priors three fields to become disabled.
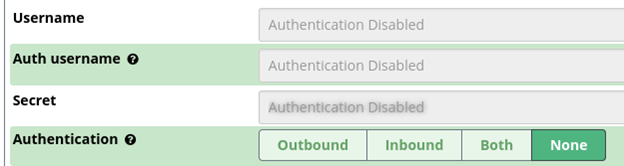
17. Registration is also set to None. This also gets changed automatically when Authentication was changed.

18. Language Code should be left on Default.
- Trunk specific languages is an advanced task.

19. Sip Server will be set to in.skyetel.com
- Legacy Note: Prior to October 8, 2021 this was na.skyetel.com

20. SIP Server Port is 5060.
- This is Skyetel's listening SIP port, not yours.

21. Context should be changed to from-pstn-e164-us, which matches the fact that our phone number in Skyetel will be sent in the E.164 standard.

22. Transport defaults to 0.0.0.0-udp and should be left that way.

23. Moving to the Advanced sub tab, most settings will be left at their default values.
24. Match (Permit) is the first that needs changed.
- On this Skyetel_Inbound route, we need to enter the full list of IP addresses or CIDR blocks that Skyetel could ever send a call from. Skyetel maintains that list on the Skyetel IP Addresses
- You need to add the 4 Standard IP addresses that in.skyetel.com resolves to, as well as the list of Emergency IPs

- This must be added as a single comma separated line, here is a copy/paste version for you:
52.41.52.34/32,52.60.138.31/32,50.17.48.216/32,52.8.201.128/32,44.199.94.192/27,3.144.141.64/27,3.101.177.224/27,35.85.225.96/27,3.99.65.224/27,35.215.45.65,35.209.126.210,35.212.222.157

25. Trust RPID/PAI should be changed to Yes

26. Send RDPI/PAI should be changed to Both

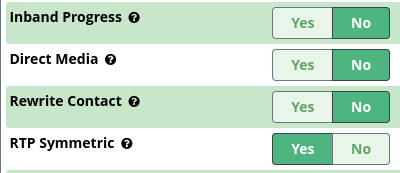
27. Inband Progress, Direct Media, Rewrite Contact, and RTP Symmetric should be the correct value by default, but verify that they are No, No, No, and Yes respectively.
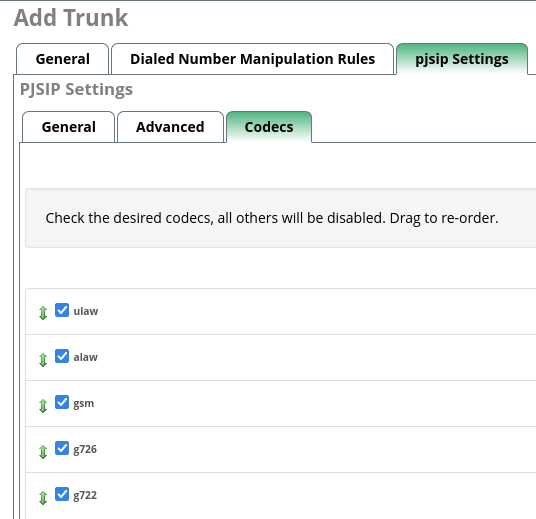
28. Final tab! Go to the Codecs tab and ensure that ulaw is in the list. By default it should be first.
- Updating codecs is an advanced task not covered here.
29. Click on the Submit button.
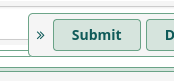
30. Click on the Apply Config button.
31. You will see your trunk listed in the list and show as Enabled. Inbound calls will now hit your PBX.
